Understanding the lifecycle of screen print frames is vital for the success of any screen printing shop. Your frames go through a variety of processes broken down into two groups. The first is pre-press activities (emulsification, exposure, screen taping). The second is post-press reclaiming, cleaning and preparing it to be used again. This article covers the different stages an aluminum screen goes through to help provide a better sense of your workflow so screen print shop owners and printers are prepared.
Pre-Press: Darkroom, Emulsion, Exposure and Taping
Before even touching a screen, it is important your screen room workspace is set up correctly. Thinking about things like temperature, humidity and light must be considered. Your darkroom is the area where you are going to prepare your screens, coat them with emulsion, and develop them so it needs to be “light safe.” This does not necessarily mean blocking out all the light as you would in a traditional photography darkroom. Instead, screen printers need to filter out UV light. If not, the room’s UV light would start the exposure processing, making it more difficult to burn and properly develop your screen.
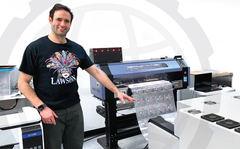
Now that you are working in the right environment, getting your screen emulsified - coated with emulsion - begins the screen’s journey through the screen printing process. The most consistent way to coat a screen is with an automatic screen coater. You can program automatic emulsion coating machines with virtually unlimited settings regarding the number of coats per side and coating speed so you can specify the exact amount of emulsion you want on your screen (also called EOM - emulsion over mesh). Other options include semi-auto emulsion coaters that move the screen while you hold the emulsion coater and a wall mounted unit that holds the screen in place for you so you can focus on proper coating technique without worrying about holding the screen.
No matter how you coat your screens, make sure to store them properly using a screen rack. The emulsified screen now needs to dry. Dry your screen print side down (squeegee side up) in a clean and light safe area. Depending on how you dry your screen, this process can take 15 minutes or overnight.
After your emulsified screen is dry, exposure is next. LED exposure units provide the quickest exposure, while the best exposure units have a vacuum motor system to efficiently compress your film positive to the frame. Without a vacuum, you will get “light creep” or “light scatter,” which is when the UV light bends around the image on your film positive. This can cause “sawtoothing” and non-straight lines on your screen. You might also end up losing halftones and fine print if your exposure unit does not have a vacuum. A proper vacuum motor solves these issues by creating tight contact between your film positive and the screen mesh.
Calculating the proper exposure time is key to a good screen. If you underexpose, your emulsion will be “soft” and too much may wash away during development or lead to pinholes on press. Overexposure will harden the emulsion, causing you to lose fine lines, text and halftones. Having a wedge test or step calculator helps dial in the right amount of exposure time as it provides real life feedback on your screen so you can see the results. Remember, a change in coating technique, emulsion and even mesh count can affect your exposure time. For this reason, LED units with a programmable touchscreen that can store your settings are ideal.
Once exposed, you can develop (wash out) the emulsion and reveal the image. One easy way to wash out the screen is with a dip tank. While most people think of dip tanks only for reclaiming, you can fill a clean dip tank with water to develop your screen. Using a dip tank in this way softens your unexposed emulsion so it can be easily washed away without worrying about accidentally blasting out any halftones or details.
If you do not use a dip tank, the best practice is to have a different washout booth separate from reclaiming just for developing your screens. This helps to minimize cross-contamination and extend the life of your newly prepared screen.
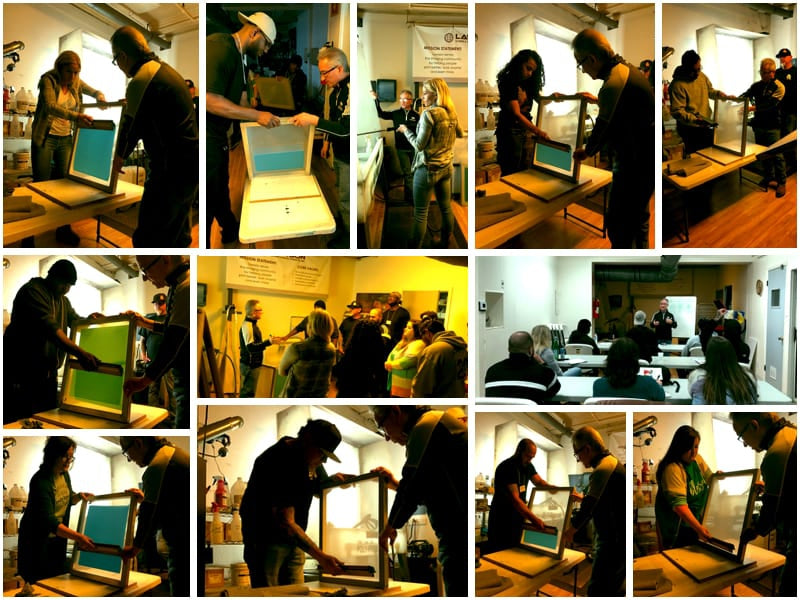
The final pre-press step is to tape the gap between the emulsion and the edge of the frame. This space is typically only a few inches so most screen printing tape comes in 2 inch or 3 inch wide strips. While there are many different tapes on the market, the most popular ones are a blue blockout or split tape. These hold up well against screen printing chemicals and ink while still coming off the screen easily when it is time to clean up. Some printers use masking or packing tape for their screens because it is a cheaper tape. However, these tapes break down quicker and can be a real struggle to remove from the mesh so while you save money upfront you lose lots of time post-production.
Post-Production: Reclaiming and Preparing for the Next Job
The screen reclaiming process begins as soon as you finish printing. With your screen still set up, scrape out as much ink as possible. Then, use some press wash and wipe down the inside of the screen to get the screen cleaning process started. After moving your screen into your reclaim room, take off all the tape.
At this stage you have two options for manually cleaning the screen. One is to place your screen into a dip tank to remove all the remaining ink and stencil (emulsion). After a few minutes, pull your screen out and power wash i
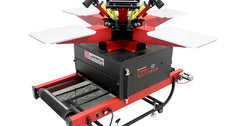
Manual cleaning can often be a dirty and smelly job that people do not want to do. For this reason, lots of screen print shops automate their screen cleaning. Automatic screen reclaiming units come in many different footprints with different features and advantages. While automatic screen cleaning equipment greatly helps, no unit is perfect. You should still expect to have to touch-up a few screens.
No matter how you reclaim, some of your screens might have a stain (or ghost) of the image you just printed in the mesh even after removing the emulsion. To remove this, try a stronger ink degradent or a specialty haze remover.
The last step in the reclaim process is to degrease your screen with a degreaser. While one of the most important steps but it is one novices often skip (or forget about). By degreasing your screen, you prevent getting “fish eyes” on your emulsion and help eliminate issues with your emulsion adhering to your mesh when you go to coat it.
Once your screen is cleaned and degreased, you want to store it somewhere to dry. Make sure the area is dust free. A drying box is always recommended as it filters and circulates hot air to help speed up screen drying, especially in high humidity areas.
Once your screen is clean and dry, it is ready to be emulsified. Thus, you can see how the screen has a never ending lifecycle of production. Eventually, the mesh will lose its tension and you’ll be faced with the decision: either throw out your screen or re-mesh it so it continues its life as a re-stretched screen.