Set up the best darkroom for screen printing by following this simple how to guide.
How to Set Up the Best Screen Printing Darkroom: Key Factors in a Screen Room
A key to running a successful screen printing business is properly setting up your screen room, also known as a darkroom. A good screen room and darkroom helps increase production, reduces consumable costs and minimizes labor expenses. You want to go through all the different stages of screen creation as efficiently as possible. Having a good workflow where you go from imaging and burning frames, to developing and washing them out, starts off your screen making process correctly.
When laying out your screen printing shop, keep in your the logical workflow of screen creation - coating screens with emulsion, drying, printing film positives, exposure, and developing/washout. It is helpful to place tools, supplies and your equipment in order of use, and orient everything in such a way that operators can easily work the equipment and move from station to station. With this in mind, here are some few factors to consider when setting up your screen room.
Be Mindful of the Environment - Temperature, Humidity and Dust
Temperature, humidity and dust are key variables to control for setting up the best screen room. Liquid emulsion and capillary film are heat sensitive so keeping your darkroom temperature controlled is a good thing. While you want to make sure that it is not freezing in the winter or burning hot in the summer, your screen room does not need to stay a perfect 72 degrees. Keep in mind that a key process in your screen room is drying screens, so the more temperature fluctuations you have, the longer your dry time.A close cousin to temperature is humidity control. Humidity level affects emulsion drying times so keeping humidity low (somewhere between 35% - 40% is ideal) allows your emulsion to dry quicker and thoroughly. The need for low humidity means it is best practice to keep your washout area and water in a separate area from your screen creation. If this is not practical for you then invest in a dehumidifier. It is important to remember that just because emulsion is dry to the touch does not mean it is dry underneath the top surface. Allow plenty of time for your emulsion to fully dry, especially in high humidity areas. Finally, make sure to keep your darkroom clean of dust. Dust particles landing on wet screens or coming into contact with film positives are the biggest reasons for pinholes when you are printing. Luckily, keeping your screen area clean and dust free is one of the easiest things to do. Start getting into the habit of cleaning your screen printing shop on a regular basis on a weekly basis.
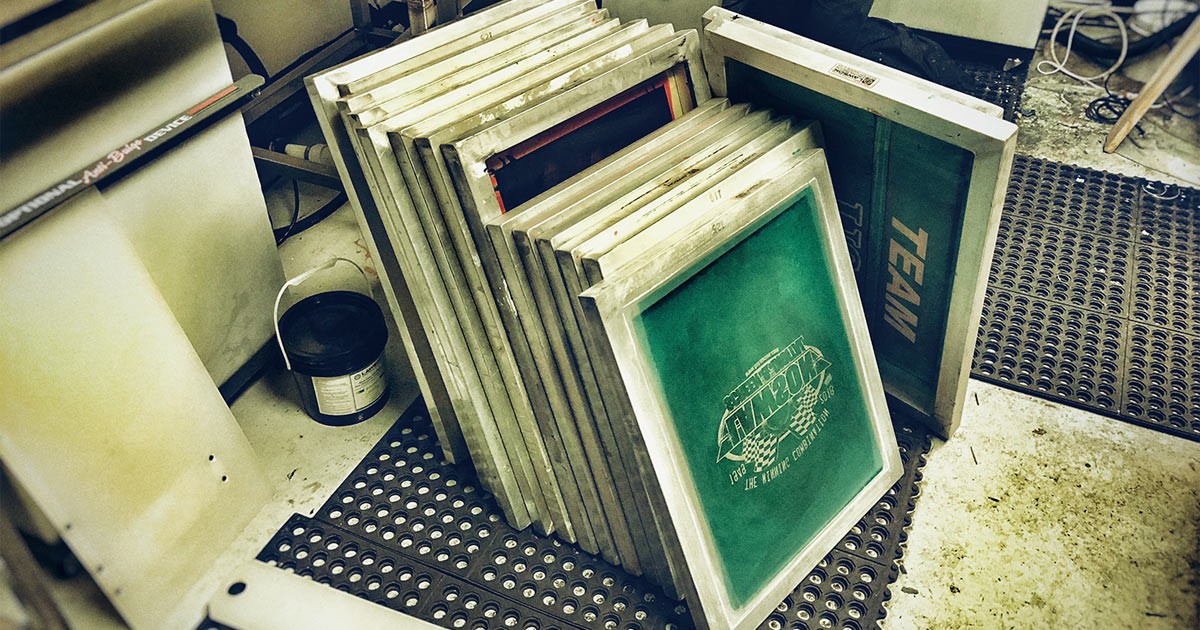
Prepare Your Screens Properly
Now that you are working in the proper environment, you will want to make sure you are using the proper tools. The tool you will use the most is an emulsion scoop coater. This lets you apply liquid emulsion to the mesh of your screen printing frame. You want a scoop coater with a sharp edge that is free of dents and nicks. It doesn’t hurt to keep a couple backup scoops on hand. It is one of the cheapest “insurance policies” you can get to make sure production doesn’t stop.After your screens are coated with emulsion, it’s important that your screens have a place to dry without dust floating around (as discussed earlier). The best option for this step is a drying cabinet like Lawson’s Pro-Cure Roll-In screen dryer. Alternatively, you can opt for simple screen drying racks as a more economical option. Some people use fans to help speed up the screen drying process when using drying racks, but be cautious. Fans do a good job of getting air moving, but they also get all the loose dust particles in the room moving as well, inevitably sending some to land on your screens. If you must use fans, keep them on the low setting and clean them frequently to remove as much dust as possible.
Washout Booths and Filtration
After your screens are dried and exposed, developing them to reveal the image is the last step for creating your screen. You can use a washout booth to wet your screen and wash away the unhardened emulsion. A better way to develop screens than with a wash out booth is by utilizing a dip tank filled with clean water. Put your exposed screen in the dip tank and the water will develop the screen for you. Using a dip tank is ideal for small fonts and halftones to minimize accidentally washing out the fine detail. Plus, a dip tank lets you develop several screens at once, instead of one at a time when you do it by hand.
Conclusion
Using this simple screen room principles and process ensures you get the best screens possible. Keep the screen prep areas well-filtered and well-dusted and dry to ensure long-lasting, high quality screens which in turn produce the best possible prints, and all while saving time and energy with these simple shop layout recommendations.